Showing posts with label compost bioreactor. Show all posts

30 October, 2019

the Johnson-Su compost bioreactor

Iteration One - February 2019

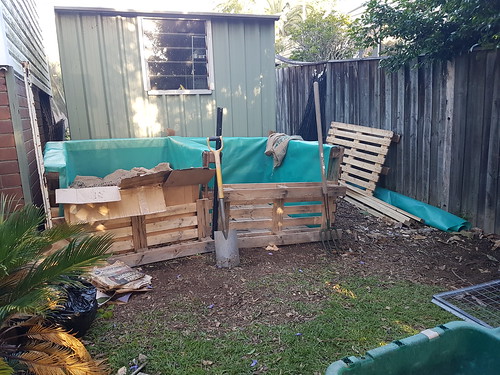
The first iteration of the Johnson-Su compost bioreactor was made in December 2018, during a permabee at my house
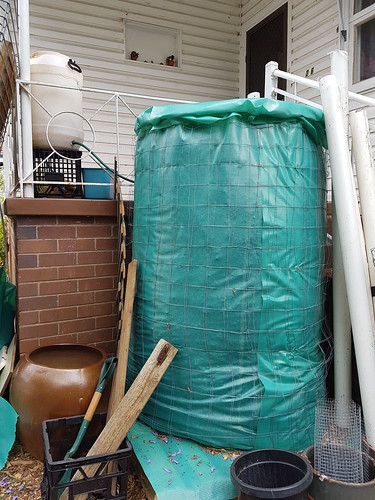
Bioreactor

There were a few variations in the way we built this:

1. The wire was thinner than it was in the video - maybe 4-gauge, while the video wire was about 6-gauge or something?

2. The plastic was green and translucent rather than black, which may have made a difference to the bio-organisms that are supposed to be occupying the compost: they may not like the light, so the outside may end up not quite as well-processed as the inside.

3. The woodchips were actual woodchips, minimum 2.5cm (1 inch) and many were rather larger.

Otherwise we built the compost bioreactor according to the specifications in this video and left it be.

I don't think there was quite enough nitrogen materials for the bioreactor, because it didn't heat up at all. I had to add coffee and horseshit to the top of it and it's not really soaked all the way through. Next time, I'll spend a couple of weeks building up the nitrogenous materials: coffee, lawn clippings, horseshit, vege refuse from the local greengrocer...

Anyway, the compost didn't hot-decompose at the start, but so far as I can tell from turning it over, it's still decomposing fairly well with a regular application of runoff wash water (sometimes mixed with human urine). It's only been 3 months, though, so it's difficult to be sure - I think you're supposed to leave it for 5-6 months at least.


Iteration Two - July 2019

I'm writing this in October 2019, 2 months ago after I had another permabee, during which we took apart the Johnson-Su bioreactor.

Permabee 2019

There was some decomposed material, but not the entirety of the bioreactor as expected from the video. The compost was filled with undecomposed woodchips. This was disappointing to say the least.

So we sifted some of the composted matter out and rebuilt the bioreactor, chipping up the larger pieces of wood and branch the better to decompose.

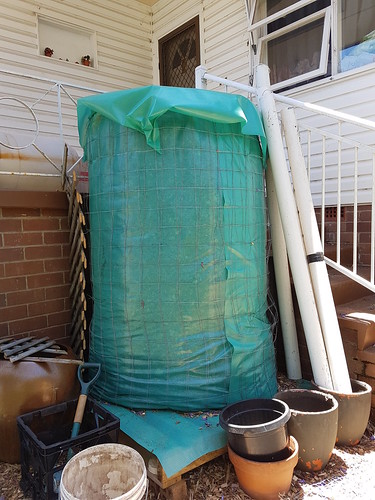
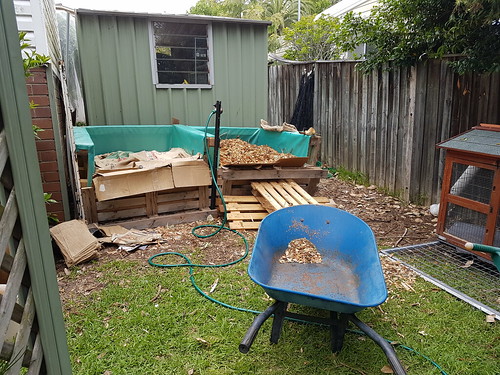
It seems to be decomposing a little faster than last time; it's been two months and it has a fairly significant slump to it, which suggests it's processing. The 'lid' has blown off - we've had some strong winds in late winter and early spring, and when it rains (as it occasionally does here) the lid fills with water that then needs to be redirected either back into the compost or into the garden.

The wooden pallet beneath the biocomposter has collapsed. It held up for the first biocompost, and then through the making of the second, but it's given up the ghost, and the biocompost is leaning rather heavily. The plastic underneath the biocomposter is very necessary to keep the pallet from rotting since the materials are being regularly dampened.

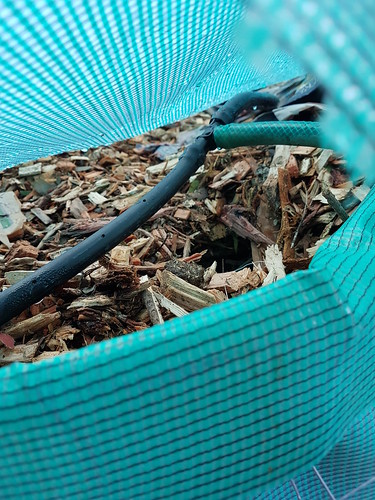
Speaking of which, a bucket a day into the water reservoir over the biocomposter, seeping down through the tubing that I put there, seems to be working pretty well. It's a manual labour that's a little frustrating, but not terrible now that spring is in and it's not freezing cold outside in the mornings.

I have recently added some 'duck straw' - straw that has been used for keeping ducks - whole and unchopped, and now I'm regretting that, just a little. I should have run it over with the mower a few times and worked from there.


several thoughts

The first video didn't really specify the size of the woodchips - it just said 'woodchips' which I've since discovered means something else in the USA to what it means here in Australia (Wood Chip Gardening: What I Wish I Knew When I First Started). The second video by Johnson on filling the bioreactor specified the size - 3/4 inch (1.75cm) size - and noted that he pretty much chopped up the leaves using either a leaf mulcher or a lawnmower.

The size of the pieces in the biocomposter is going to make a big difference, I feel. As with any compost, when you're making it, you want things to be damp and chopped up into small pieces.


Going forward

At this point, I'm not sure that making it a third time would be terribly helpful: while the plastic is still okay to go, the wire is falling apart and probably best suited as a climbing frame for something light - beans or peas, perhaps. Also, the pallet underneath would need replacing. I guess it's a different kind of compost to the hot compost in the composting bays, or the stuff that I make in the black geobins.

Ultimately, the value of the biocompost is in the high volume of microbial-organisms that take up residence in the decomposing compost due to not being regularly turned the way a 'hot' compost would be turned. Also, not having to turn the compost - a big attractant given how many composts I have that require regular turning over!


I probably wouldn't want to make it more than once a year; let it sit for six months, gather up the materials for the other six months, breaking them down, then making the compost and letting it sit.

Hm. I'm also wondering if I could make the biocompost using a geobin structure for the framework.

29 July, 2019

Permabee: what happened next

It was a much smaller permabee than the one in December – only 7 people including me. Thankfully, Margaret of Moss House brought her partner Kris along to help and he provided plenty of muscle and practicality.

We moved the water tank, remade the compost bioreactor (chopping up the smaller pieces in the process), and planted out the front treefence.

I dithered a lot. Particularly in the planting of the treefence, but it’s done now. From the north, going south:

  • seed avocado (already planted)
  • kaffir lime
  • elder tree
  • macadamia
  • lemon tree

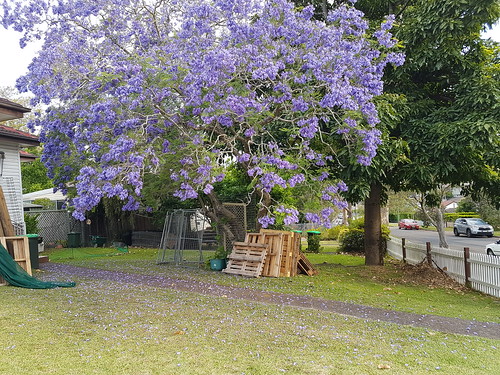
Having discussed the removal of the jacaranda with my sister, we discovered that Margaret’s husband loves both climbing (with ropes and harnesses) and tree lopping. He’s willing to do it ‘just for fun’. That’s $1K saved! Now just have to deal with the council on the issue of the jacaranda.

I’m thinking we might do the food forest around the Flame Tree. The chiefest problem is that all the trees that we have left are evergreens: black sapote (chocolate pudding), kumquat, mango, lychee, etc. And they’ll block out the light under the tree in the middle of summer which is not the best outcome.

Perhaps the kumquat could go at the lounge corner of the house, while the lychee is at the lounge-porch corner, add the acerola cherry in as a low hedge/bush to shade the brick wall… That leaves the mango, banana circle, paw paws, pineapples, 1x avocado, and chocolate pudding tree for where the jacaranda presently is, once it’s been cut down. That should get sun all year around. Water may be a problem but isn’t it always? I can probably run a bucket greywater line out that way eventually.

The mulberry and 1x avocado at the gate corner would also work nicely: they won’t be blocking anything but each other, and the mulberry should provide the avo with some shade/protection, so long as I keep it trimmed down. Maybe?

Temporary plantings along front bed (one season)

  • sunflowers
  • marigolds
  • poppies/poppy mixes (rake away mulch, bare a line of soil, moisten soil, sow seeds, moisten with soil)
  • eggplant
  • tomatoes
  • broccoli

Plant (perennials, longer term)

  • comfrey & borage
  • lawn thyme (dig out around the water tap and plant the thyme)
  • oregano
  • rosemary bush
  • lavendar
  • parsley
  • allium flower bulbs (not sure if annual or perennial)
  • lemongrass
  • rhubarb crowns (need to acquire first)
  • vietnamese mint

Good planting days for August are listed here and I still have to think about what to companion plant with the apricot. I have asparagus which aren’t performing fantastically where they are – decent, but not amazing – but sometimes I feel like that’s the story of my garden…

22 July, 2019

Permabee plans (iteration 1)

Move water tank
a. prereq: chop down bush
b. prereq: set down frame to hold gravel (sleepers)
c. prereq: gravel into frame
d. buy: short metal stakes for framework, ~1m cube gravel

undo biocompost & remake
a. empty biocompost
b. reset frame
c. chip the chips to make them smaller
d. remake biocompost
e. get: coffee grounds, horse manures, grass clippings from neighbours, café wastes; mix it all in. (ask for: comfrey and other micronutrient plants)

plan(t) out front food forest/fence
a. macadamias and acerola cherry
b. elder | loquat | mulberry | black sapote | avocado
c. citruses (? bad time in winter – leave until Oct-Nov and plant down at the edges of flame tree once jacaranda is gone?)
d. underplanting with borage, vietnamese basil, comfrey, sprinkle with floral seeds in between

plan(t) out banana circle
a. not actually a circle, but certainly a grouping:
b. bananas, mango, pawpaw, black sapote, lychee, avocade
c. ginger, galangal, turmeric,

05 December, 2018

the permabee post

So Sunday came and was crazy hot - 35C with strong winds in the afternoon.

But we got SO MUCH done!

1. Permanent chook run

Ironically, while this was something I particularly wanted completed, it didn't get finished. It didn't even get started, due to the one thing which I'd casually earmarked as 'necessary but not an actual task' turning out to be seriously labour and time-intensive!

I'll talk about this at the end of the list.

2. connect up rainwater tanks

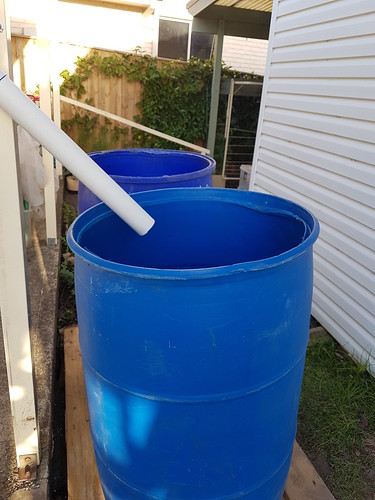
This was beautifully done! Two linked 60L barrels set on a platform with a tap installed so the water can be bucketed elsewhere, or channelled down a hose to the orchard!

Permabee 2018

3. make composting bioreactor

At first the bioreactor was difficult because nobody had seen it done before. However, after I got my laptop out and showed the taskgroup the video of the Johnson-Su bioreactor, they got the gist of it, and things proceeded pretty well.

A compost bioreactor is essentially a 'set and forget' compost that's supposed to be very rich in fungal nutrients because it doesn't get turned to aerate, thereby requiring the biota to readjust when everything is turned over. Instead of turning, six 'air columns' run through the middle of the pile, allowing the bacterial to breathe and do their thing. It takes a while to break down (some 5-6 months was the estimate) but the results are excellent, and not having to turn it means you can create several of these around the yard and deplete one while others do their thing.

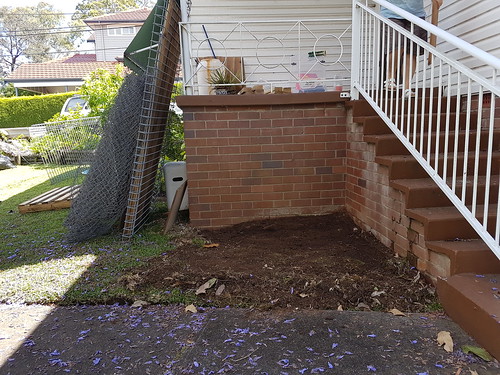
Bare space where the bioreactor is going:

Permabee 2018

They put down a wooden pallet on bricks (to keep it from rotting) and then positioned the bioreactor on top.

Completed but lidless bioreactor on the day:

Permabee 2018

The bioreactor contents were basically two garbage bags of horsemanure, two containers of guineapig litter, one container of chook litter, and a helluvalot of chip mulch.

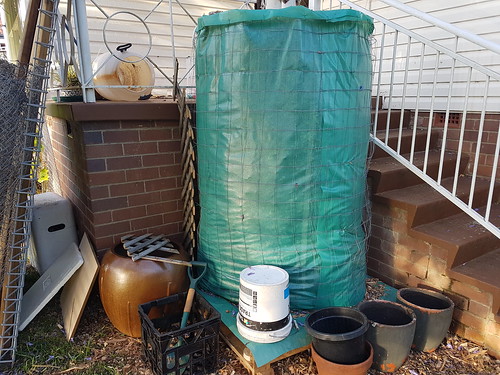
A day later, with the pipes pulled out to leave the airholes, and a 'lid' on top to keep the moisture in.

Garden December

Two days later, with a water barrel that gets filled with the 'waste shower water' that fills up a bucket while showering, and which seeps into the compost to keep it moist:

Bioreactor
Bioreactor

This one, more than the other projects, will probably have pictures in future, so others can see what it looks like as it breaks down over time.

4. (move lattice and) set up composting bays

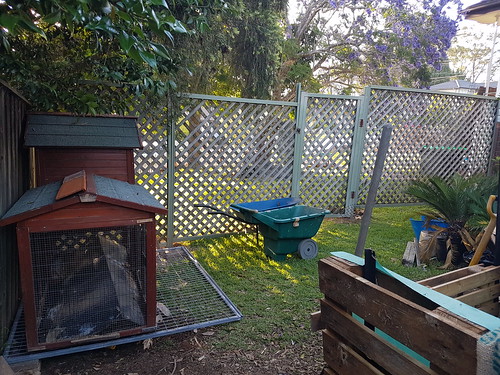
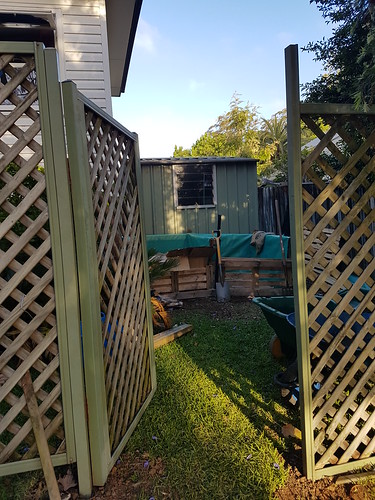
The front and back yards of the house were previously defined by the position of a lattice that ran in line with parts of the house. It left a gap behind the shed of about 1.2m, enough for a composting space, but not a very easy place to work. I wanted the lattice moved forward to run in line with another corner of the house, and a couple of compost bays set up behind the shed.

Late on Sunday afternoon:

Permabee 2018

This afternoon (Wednesday):

Composting Bays

The idea of the composting bays is to have something that regularly gets added to. Paper wastes, vegetable wastes unsuitable for the worms or chooks, possibly chook manures. It will require turning after a while, but right now, it's just settling with the compost that was made on Sunday (left-hand bay) and the pine-and-banksia woodchip mulch that I've been filling the right-hand bay with for the last couple of days. We'll see about the results - ideally, there should be more 'green'/nitrogenous wastes to make a hot compost, but the chips are only about 4 days old and might still have some decomposing to do. Either way, neither of these composts is likely to be much use for a few months at least.

5. empty, move, and refill vegepod

This took somewhat longer than I expected; I was just expecting a move-to-a-new-location, but the wonderful women working on this task went about not only repositioning my vegepod and making sure it was flat and supported and positioned to my satisfaction, but also turned it into a wicking bed. Which I kind of wanted, but didn't figure I had the time/materials to do.

Well, they found the time and scrounged the materials, and although this meant that the task took longer than expected, it's a wonderful surprise and will be extremely useful!

Permabee 2018

Next week, I'll plant out the melons, cucumbers, tomatoes, eggplants, and mild/sweet peppers that I've been growing for the last month, and set up some wires to run up to the roofline. The goal is to get the vines growing up those wires to give a little shade to the house in the coming months of hot northerly sun...

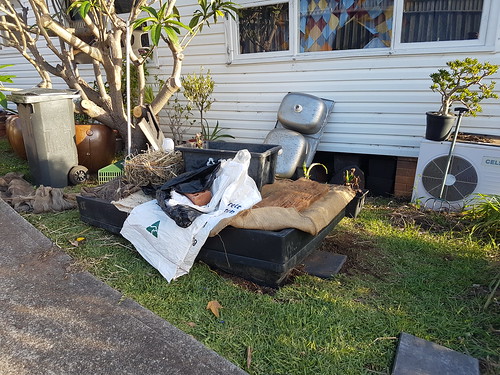
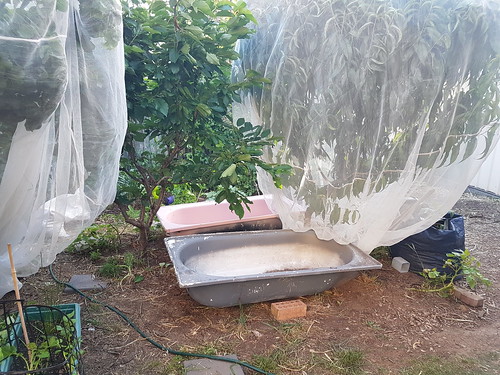
6. set up bathtub gardens

We moved the bathtubs, and that was about it. I needed to seal up the holes in the tubs, and I haven't. But they're in the location I've envisioned, now I just have to get them sealed and re-positioned, and then we can add what goes in them. One water garden, one above-ground garden - possibly a wicking bed.

Permabee 2018

Unexpected

Team Chook Pen had the task of not only creating a run for the chooks, but moving two lattices (one of them blocking the area for the compost bay) and combining them into a single fence.

I put this down as a throwaway line - in brackets - a task that needed to be done in order to get around to the chook pen.

It took ALL DAY.

Out of all the tasks, this was the most time-intensive one! Taking the lattices apart, digging out the fenceposts, digging the new post holes, putting it all back together... A team of five or six started when the bee began, around 10am, and it was pretty much the very last thing to be completed around 4:30pm.

WOW!

But the result is also WOW!

Permabee 2018
Permabee 2018

Overall, that is easily several months (if not several years) worth of work done in a single day by dedicated teams of people who love gardening. The old adage "many hands make light work" precisely sums it up!

The non-existent chook pen is a bit of a pain, but I have a reasonable idea of how to go about it now, I just have to kick myself into actual gear in the next couple of weeks...

I'm thinking about applying for a permabee next year, too - this one to simply plant out a food forest along the picket fence line...

28 November, 2018

Permabee

Got a permabee happening at my place on sunday - a Permaculture working bee - with my local permies group, and while I'm looking forward to it, I'm also a little worried that I won't have enough to keep everyone occupied for the entire day.
Garden Nov 2018

1. Permanent chook run
- using metal fencing in picture
- this is somewhere for the chooks to go that isn't the backyard while I'm growing things out the back in the middle of summer. I can move the chooks around the backyard in winter, but I want the space for growing things in summer
- need to work out the plan of which piece is going where and how to make it all fit together (or I could ask people to do it?)

2. connect up rainwater tanks - the main 4000L rainwater tank hasn't arrived, but we have a couple of 60L barrels that could be set up next to the carport and connected up to the downpipe there.

3. make composting bioreactor
- full resource guide
- this is an experiment in seeing if this kind of composting system could work: just set and forget until it's needed six months later (and I always need soil in my garden)
- this will be the most labour intensive one to do

4. (move lattice and) set up composting bays
- one video here
- another one here
- still another one here

5. empty, move, and refill vegepod
- can do this myself but will be easier with multiple people

6. set up bathtub gardens
- can do this myself also

On re-reading this post, I suspect I've underestimated just how long it's going to take to do some of these things. We'll be lucky to get the chook pen, the bioreactor, and the compost bays done in a day, I think!